
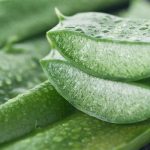
Aloe Vera (Ghritkumari) revitalizes dry skin and adds life to lifeless skin. I have shared some of the most amazing benefits of Aloe Vera for skin and hair in my previous post. Here in this article I will be talking about how to prepare Aloe Vera gel at home.
There is nothing better than preparing your own Aloe Vera gel at home – free from chemicals and preservatives. Luckily Aloe Vera grows in all types of soil and it can be easily grown in a medium size pot in your balcony or house garden as the plant grows to a height of approximately 2 feet. So you can prepare your own fresh gel whenever you want. The only drawback with the gel is that it decays very fast. The shelf life of fresh Aloe Vera gel in refrigerator is for a week only. Decomposition of the gel starts immediately after the leaf is cut from the plant.
Few tips are worth mentioning here regarding planting Aloe Vera at home:
- While planting the roots of the aloe plant in the soil, be careful not to let the green leaves enter the soil else they will start decomposing.
- Aloe plant should be exposed to sunlight for 8-10 hours. They grow best in hot environment. Having said that, be vigilant of its leaves if they start turning brown (burnt actually) due to high temperatures (It happened with my aloe plant!), then shift it to a shadier place. At the same time if the leaves are too low lying towards the ground (usually they grow upwards at an angle), it means they need sun.
- Most important point to remember is that always choose pot with a hole at the base so that excess water is drained away since Aloe Vera goes bad if there is standing water in the pot.
- Aloe plants need regular watering but avoid over-watering. The leaves of the plant store lot of water and need to be watered only when the soil goes dry. By looking at the leaves, you can make out what treatment they need. Thick and fleshy leaves indicate they have stored enough water. And if the leaves appear thin and curled, they need to be watered.
Please follow the below mentioned step by step procedure to make Aloe Vera gel at home:
-
-
-
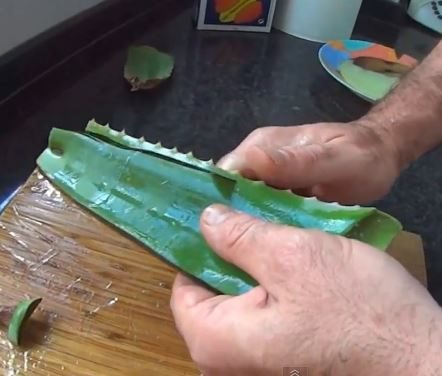
- Cut an Aloe Vera leaf from your aloe house plant.
- Cut an Aloe Vera leaf from your aloe house plant.
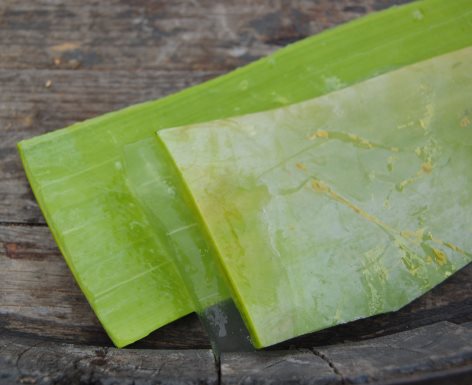
- Remove the frayed edges.
-
-
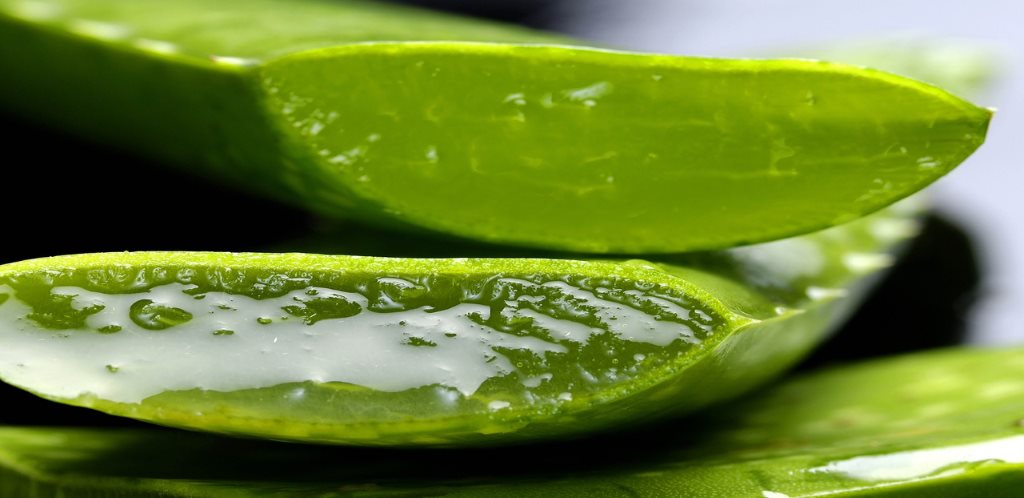
 3. Now remove the skin of the leaf by placing the knife under the skin and slide it along the length. Avoid the bitter yellowish juice called latex that seeps from the leaf when cut as it contains toxins. Take only the transparent gel. Remember, there are 2 types of juices in an Aloe Vera plant. The yellow colored ‘juice’ called latex immediately beneath the skin of the leaf and the colorless mucilaginous slimy ‘gel’ in the center of the leaf.
4. Turn over the leaf and repeat the same process.
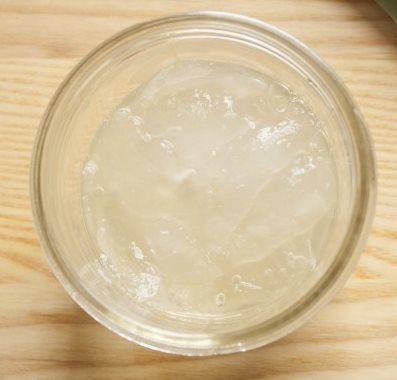
5. After the skin is removed, we have in our hand pure Aloe Vera gel. Now pour it in a clean glass container and refrigerate.
6. You can apply Aloe Vera gel directly to your skin or add pure cold pressed oils like coconut oil, olive oil, wheat germ oil to enhance its skin nourishing benefits. You can also mix lemon juice or vitamin E or pure rose water to the gel and apply.

Recent Comments